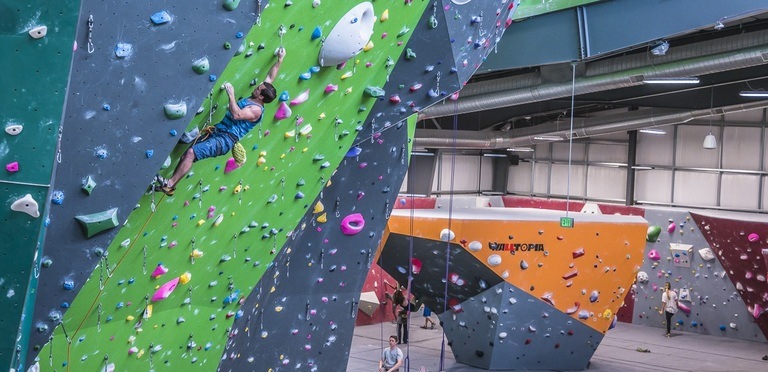
No further way except your own bouldering wall is to enhance rock climbing. A wall simulates rock climbing needs and allows you to focus on technology as you get better. Bouldering is a great full-body exercise, but it's a great experience, above all.
A bouldering wall is built in the same manner as a timber-framed house: the concrete walls are made of a wood frame connected to an existing system or assisted by an own design.
Building your own wall would be a breeze if you know the simple building techniques. This guide will give you all the detail you need to build and schedule your dream wall if you do not feel secure running a circular saw or really have little time and no desire to let the sawdust fly. You would then employ a craftsman to manage the entire building.
1. Visualize Your Project
Now that you understand the vacuum, try to imagine the simple form that your wall wants to take. Visualize how various forms, heights, and corners are going to appear. Make some rough drawings of various plans to see how it fits in.
Once you've chosen the form, position and orientation of this climbing wall, make a model size with a carton or foam board.
Beware that certain forms and angles generate identical movement and restrict variation when selecting your wall type. Horizontal and vertical roofs are renowned for looking the same regardless of how much you carry or pass them on. If you are not patient, curves and complicated forms can also contribute to stiffly homogenous climbing. When they are new, these types of features look cool, but get dull fast. The most varied movements tend to be the flat, superimposing walls of between 20° and 45°.
Consider the wall as an 8-foot array of modules. Identify one or more simple wall outlines that you want to use in your design, depending on how much room you have. The 8"-width (1 single sheet of plywood) configuration of these modules will simplify construction and ensure decent material output while keeping costs down.
Play about and arrange these main walls in a number of different settings until the effect is fulfilled. Mind to leave space to fall from any specified place without touching another wall while placing the walls.
For walls over 20 or 30°, you need a small, vertical blocker platform at the bottom such that your feet can provide enough space at the beginning of issues.
Now build secondary walls , fill in a smooth system of climbing between the primary walls. You can easily render triangular panels between your principal walls to create 90° angles. The secondary walls need to be more complex as they face each other, turn angles, or doors, window panels and other frameworks.
2. Construction The Wall

Each of the walls should be framed independently. Create a frame segment before installing the next frame piece and mount it to the support structure. Start at the biggest or the biggest wall and move towards the smallest or least significant one. This allows you to make the required room modifications with less trauma. If the structure is in place for the primary walls, the secondary walls would be connected to external framing members.
Set up flat walls that are not too steep and mounted in as a unit, similar to the walls of a tower. Place on the floor the plates top and bottom and the two external stub. Determine the height of the two diagonals horizontally from opposite corners to make sure the picture is square. Adjust the frame to match the horizontal and lock with screws the corners.
Measure the plates and mark an inside studs every 16 in. Make scales on top and bottom of the same . Measure from the external grip to the center of the first internal grip and then center to center for the remaining grips. Be sure that the plate ends in the center of a gable, if the Wall is larger than a sheet of plywood, then the next sheet can be attached to the same Gable. If the distance and measurement is 16′′ or 24′′ right, this is handled easily.
Wood is not always smooth, so look at each bowl to see how it bends. Combine the frame to the back side of a wall . Set the bowls in place with a square framing to ensure that any bowl is square up and down. Make sure the outside frame is quadratic and scrub it all.
You would not be able to physically check the accuracy of the attachment because you are screwing through drywall. Make sure the torches are firmly in and resistance is high. Sheets with concrete expansion anchors may be fixed to concrete walls or floors.
When the wall is running parallel to the ceiling sleeves or at any orientation other than perpendicular, go parallel to sleeves and are separated by 24′′ centres, collecting a minimum of three sleeper sleeves from each. Then tie the top plate of the wall to the people who sleep.
Overlapping walls move loads differently from vertical walls to the supporting frame. They are more similar than walls on residential ground. Frame steep walls with the first join header joists into the house ceiling jars and wall stubble, which are the opposite of the top and bottom plate. Screw each header with at least two #15 screws per stud or joist into each stub or joint.
Ensure the header joints are square and flat so your wall and plate frames match properly. It is difficult to have completely square and level urban walls, floors or ceilings, so don't focus your place on the current building. Check with a scale of level and tape the header joists.
Then run plugs every 16 inches among headers again, confronting every jerk's crown . Join the joists with the clothes of the joist. Only at the end of each join, cut a short sides segment against the hanger.
3. Plywood Sheet
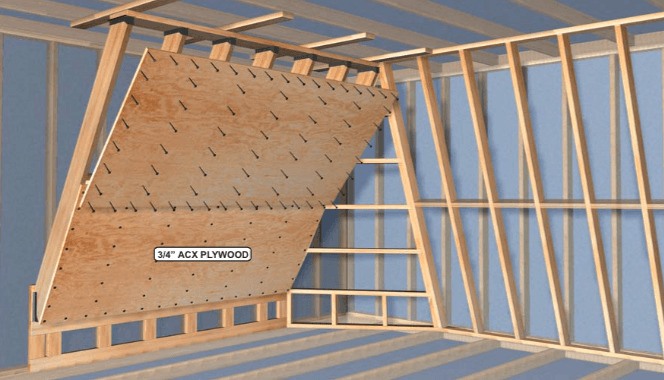
You must mount the t-nuts until the splice is connected to the frame. On the horses saw and lock them along, stack 3 to 6 panels. The ACX splinter sheets come with a "A" side and a "B" side, which means that a side with less emptiness or defects is of a higher plywood class. Sided in front of the "A." They face the climbing surface while the panels are in place.
Mark where the carts are when the panel is located . Typically, it's simpler to place the panels vertically on the frame, but now take care of it and mark the joist angle if it suits the wall arrangement in a better right angle. You may arbitrarily design or pierce a grid pattern. Don't holes wherever the joists are going to be either way. The more you need 200 and 300 t-nuts a box. Plates that go to bottom often take footholds so that you can easily mount less T-nuts and use a screw.
You can drill the T-nut holes with a 1/2′′ Forstner or punch-style bit. It's important to drill the trout straight. For your manual, you should have pricey boxing press accessories which will guarantee a straight hole.
Cut out all the essential panels in size if your design needs something other but complete 4x8′′ tiles. Before deploying the T-nuts, please ensure that you cut and check their fit.
4. Compulsory Material
●Plywood: 3/4″ ACX, 4’x 8′ sheets
●Self-drilling decking screws: #16 x 3-1/2″ (or 4-1/2″), #12 x 3″, #8 x 2″
●Wood framing-studs: 2″ x 4″, 2″ x 6″, 2″ x 8″, 2″ x 10″
●Nails: 16d vinyl-coated, sinker
●Concrete expansion anchors
●T-nuts: 3/8″, 4-prong, steel
●Framing connectors
●Joist hangers
5. Painting
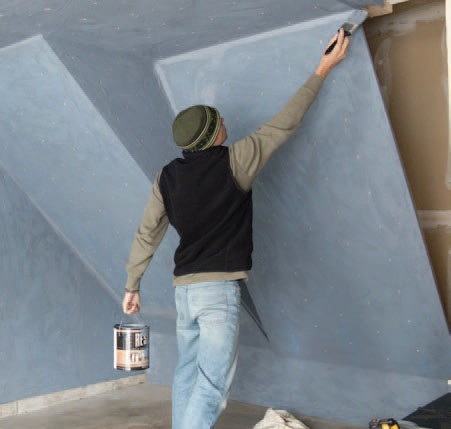
Bare woods are good for indoor walls, but a paint coat is important whether the wall is outside or in damp surroundings. Any color of the exterior is working. Connect the T-nuts and golf tees to avoid the paint leaking out
6. Safety Zone
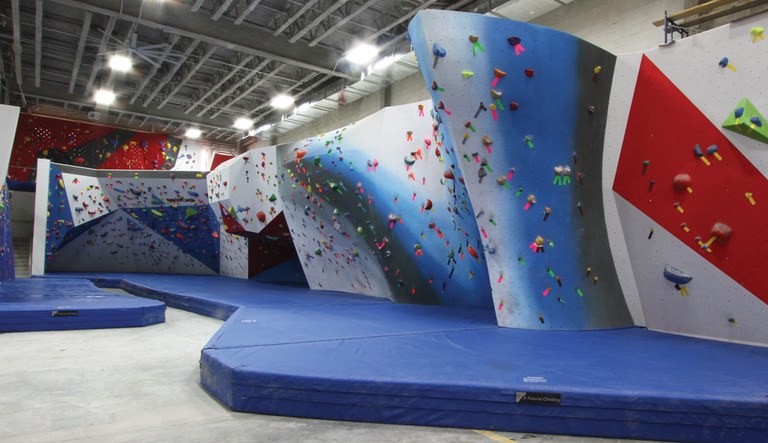
The region below and around your wall must be kept secure to collapse. Make sure this field is cleared of items that may be struck or landed in the fall. Do not boulder over unpadded, gravel, wood or other rough surface at all. If the surface is directly damaged, severe headache or even death may result. Also grass and turf were losing their capacity to withstand the wear and weather shock. Your collapse zone has to stretch enough far to prevent swinging slides or dynos. If the wall is steep, it can take you several meters over the wall edges to extend your drop zone.
Multiple padding alternatives are available, like industrial bouldering mats, ancient mattresses or several coats of carpet foam. You must nevertheless take very seriously the duty to ensure that your fall zone is prepared. Artificial climbing regularly retains spin or split and leads to violent, uncontrolled crashes. You must never be in a position to injure yourself or someone in the event of an accidental fall.
Conclusion
You would want to hop on the wall and start practicing like a circus monkey, complete and intoxicating views of your climbing partners' burning with your newly discovered power to cloud your opinion. Be attentive! Home bouldering walls are so convenient, effective and enjoyable to use that overuse accidents can be easily created. Often bundle up and make sure you have plenty of downtime between the sessions. The effect of muscular imbalance is always overuse injuries and it is therefore necessary for your adversarial muscles to be worked.
Follow this easy tip and soon you will be on the way to the best training season ever.


