As travelers try to extract as much power from solar as they can to charge their batteries and run all those camping necessities and luxuries, solar power has never been more common in touring setups. There are many parts that must be present and functioning for a solar setup to be effective; we're here to walk you through the fundamentals so your solar system can start up. And here are some steps on the list of how to set up camping solar panels with an inverter.
How to Set Up Camping Solar Panels with Inverter
In essence, solar power is the process of turning solar energy into electricity. You can obtain portable solar electricity when camping or traveling off the grid thanks to this simple, affordable, and environmentally friendly alternative power source. With the development of lightweight folding solar blankets and portable solar alternatives, users can now easily obtain 12 Volt electricity for camping anywhere, which has increased the popularity of solar for camping. Here are a few of the procedures for setting up camping solar panels with an inverter. And here are some steps on the list of how to set up camping solar panels with an inverter.
The Power Requirements
The power requirements are the first thing you should know on the list how to set up camping solar panels with an inverter. Understanding your energy needs is the first step in installing a portable solar power system or a house solar power system.
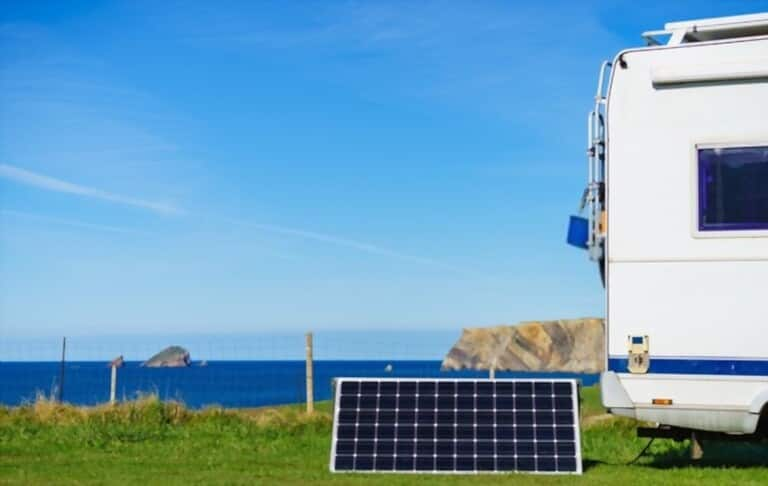
When it comes to scale, solar power is an incredibly adaptable source of energy. The system's size or required power should be determined first. Making a list of the items you wish to use your portable solar panels to power is the first step. Anything from a few LED lights, a smartphone, a tiny table fan, or a coffee machine might be considered as part of this.

The Solar Panels
It is essential to choose the size and kind of solar panels after determining the entire quantity of power needed. Let's say that your entire power usage is 80 W, taking into account the appliances indicated above.

Given the efficiency losses and the unpredictability of the sun's rays, 100-watt solar panels would be a realistic choice in this situation. Regular panels, flexible panels, and tough, transportable solar panels are all options.
Although the essential operation of all solar panels is the same, each one has its benefits. The most affordable solar panels are regular, rigid ones, however flexible solar panels are also quite strong and portable.
With their covered edges, portable solar panels are a little bit more robust. Thanks to mounting kickstands, it's simple to place them correctly. Another, more compact choice are transportable folding solar panels.
Battery and charge controller
The next thing on the list for how to set up camping solar panels with an inverter is battery and charge controller. A battery and a solar controller are required for safe battery charging in order to utilize solar power at night. We must first determine the amount of energy that has to be stored before choosing the size of batteries to purchase. The 100-watt, 12-volt solar panels that we chose will provide roughly 400 Wh of electricity, assuming that you are located somewhere with four hours of continuous sunshine.

The following calculation should provide us with the battery size in ampere-hours (Ah), allowing us to build a battery bank that can hold the full 400 watt hours:
It would be advisable to choose a 50 Ah or 60 Ah battery, taking into account a buffer for battery efficiency and depth of discharge (the real discharging level a battery can manage). For solar kits, a variety of battery types are available, but to reduce maintenance difficulties, choose sealed maintenance-free solutions, such as lead acid or lithium batteries. Deep cycle batteries are preferred if you desire greater energy per volume.
Safe and effective solar charging requires the use of a solar charge controller. You can use a 12 V or 24 V charge controller in this situation. You can use two 30 Ah, 12 V deep cycle batteries linked in series in place of one 50 or 60 Ah, 12 V battery if you want to use a 24 V battery charge controller, which necessitates having a 24 V battery bank.
PWM charge controllers are the less expensive of the two types of solar charge controllers, but they are also less effective. Battery charge controller prices have dramatically decreased in recent years. To get the most out of your solar panel system, it is usually advised to set it up with an MPPT controller.
The Inverter
To convert DC electricity from your solar panels or batteries to AC, you need a power inverter. You don't need an inverter if you utilize DC-supported gadgets that your batteries power directly. To operate conventional appliances as well, it is advised to have an inverter-based system.
When all the appliances are running at once, the inverter should manage the power conversion while also providing a safety buffer to account for a potential power surge. A 200-watt power inverter might be a good choice in this situation. The greater efficiency of pure sine wave inverters are advised.
The Wiring
Wiring is the next and most important step in establishing your own solar panel system. If you use a 12-volt system, you may connect two 50-watt panels in parallel or use a single 100-watt 12-volt panel. Connect them in series if you're putting up a 24 V system by attaching the positive terminal of one panel to the negative of the other. Regular and flexible solar panels are installed using the same process. Installation of a solar panel system with two panels is typically more difficult than one with a single panel.
The Advantages Of Solar-Powered Camping
Solar energy is a natural, renewable, and, best of all, cost-free clean energy source. You may visit unpowered and isolated areas by using a sufficient portable solar power system without having to give up things like refrigerators, LED camping lights, mobile gadgets, and more. While you can typically avoid paying higher prices for powered sites by camping in these areas. Additionally, replacing a generator with some portable solar panels allows you to preserve the tranquility you sought outside (simply so you can power your fridge).
What You Need In Order To Solar-Camp
Camping solar panels, which are small and portable, a solar regulator, a deep-cycle auxiliary battery, and an inverter are all needed for a self-sufficient solar setup if you intend to charge 240v equipment like a laptop or television. The way these goods work together is straightforward: solar panels collect energy from the sun, which is then sent through the solar regulator into the battery. Solar regulators, often referred to as charge controllers, are crucial since they guard against overcharging or fluctuating charge harming your battery.
There are several types of solar panels, including mono-crystalline, poly-crystalline, and thin-film amorphous. Although mono-crystalline solar panels are more costly than poly-crystalline ones, they are also more effective, capturing more solar energy from a pair of identically sized panels. Although amorphous panels need more surface area than mono- and poly-crystalline panels, it should be noted that their biggest advantage is its ability to be rolled or folded into modern solar blankets for compact storage when not in use. This isn't the case with mono- or poly-crystalline panels since they need to be laminated to glass in order to be adequately protected due to their fragility.
Conclusion
The next thing we'd advise knowing is how much battery capacity you'll need in your campervan electrical system now that you've learned how to set up camping solar panels with inverters.

